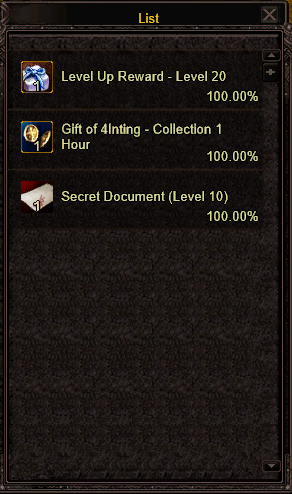
On 4Inting you get free gear and boosts as you level up, so you can reach the end game without grinding for basic equipment. Every pack also contains the next Level Up Reward.
Level 10
Your first reward.
Level 10 reward
Item
What it is
Collection (1 hour)
Automatically raises your drop from monsters
Secret Document (Level 10)
Entry to the level 10 Secret Document
Level Up Reward · Level 20
Opens at level 20
Level 20
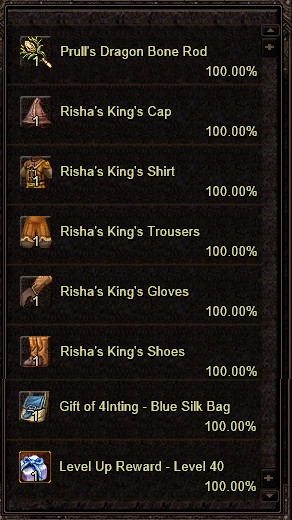
A full +15 set to level up comfortably.
Level 20 reward
Item
What it is
Weapon +15
For your class
Risha's King's set +15
Cap, shirt, trousers, gloves, shoes
Blue Silk Bag
Extra inventory space
Level Up Reward · Level 40
Opens at level 40
Level 40
A standard jewellery set.
Level 40 reward
Item
What it is
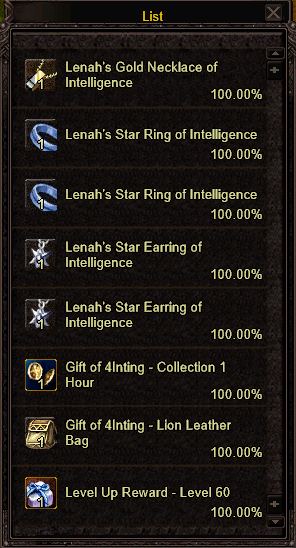
Lenah's Gold Necklace of Intelligence
Necklace
2x Lenah's Star Ring
Rings
2x Lenah's Star Earring
Earrings
Collection (1 hour)
Automatically raises your drop from monsters
Lion Leather Bag
Extra inventory space
Level Up Reward · Level 60
Opens at level 60
Level 60
A full +18/34 armour set and weapon for your class.
Level 60 reward
Item
What it is
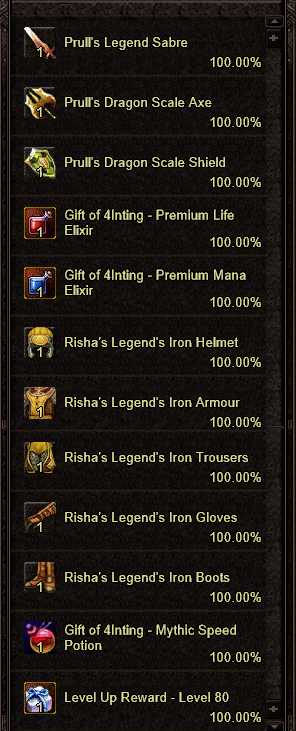
Weapon +18/34
For your class
Full armour set +18/34
Helmet, armour, trousers, gloves, boots
Premium Life Elixir
Potion
Premium Mana Elixir
Potion
Mythic Speed Potion
Potion
Level Up Reward · Level 80
Opens at level 80
Level 80
Everything that makes farming comfortable.
Level 80 reward
Item
What it is
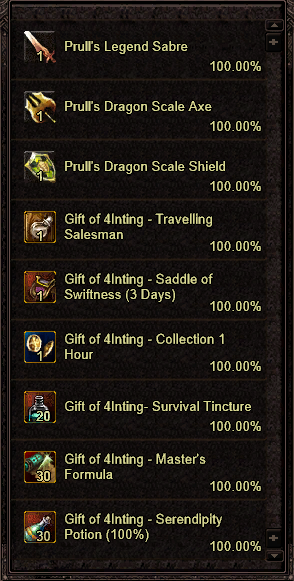
Travelling Salesman
Buy and sell anywhere, 3 days
Saddle of Swiftness
Mount speed 175%, 3 days
Collection
Automatically raises your drop from monsters, 1 hour
Survival Tincture
x20
Master's Formula
x30
Serendipity Potion (100%)
x30
Item names in the screenshots are examples for one class. You receive the items for your own class.
Rewards from Aaron's Time-Space quests (for example level 49 for level 34 weapons and level 69 for level 38 weapons)
Level 38 Armour
Every class has two armour sets to choose from. The helmet, gloves and boots need 3 Osiris Gemstones and 12 Water of the Worlds, the chest and legs need 5 and 14.
The Boyd's weapons are made in one step from farmed materials and Inting Coins. Every weapon uses the same recipe, except the sword, shield, dagger and wand: they need half of every ingredient.
The level 38 weapon is made in two steps. First craft the level 34 weapon (pre-PvP), then use it to craft the level 38 weapon. Every weapon has its own recipe: the Holy Stone, the amounts and the quest items depend on the weapon.
Upgrading raises the level of your weapon or armour (+1, +2 and so on). Higher levels mean better stats, but every attempt above +10 is a risk.
Upgrade levels
The Enchant Table
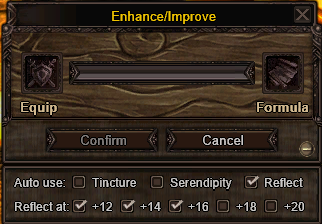
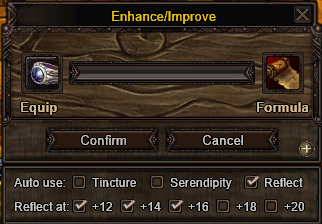
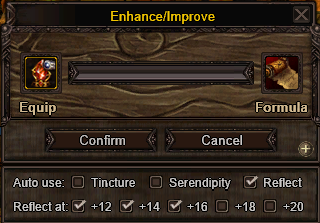
Enhance / Improve window
Put your item in the Equip slot and a Master's Formula in the Formula slot, then press Confirm.
Tick Auto use to use a Survival Tincture, Serendipity Potion or Scroll of Reflection automatically on every attempt. With Reflect at you choose at which levels the Scroll of Reflection is used.
How an upgrade works
Result
What happens
Success
The item goes up by +1 to +3 levels
Fail with Survival Tincture
Below +11 the item stays as it was. From +11 up it loses 0 to 2 levels
Fail without Survival Tincture
The item is destroyed
◆
Always use a Survival Tincture above +10. Without it, one failed attempt costs you the whole item.
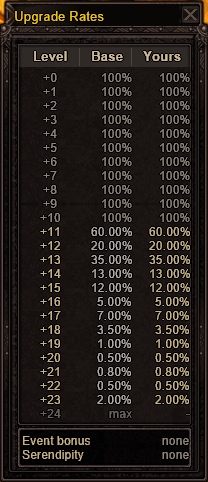
Upgrade chances
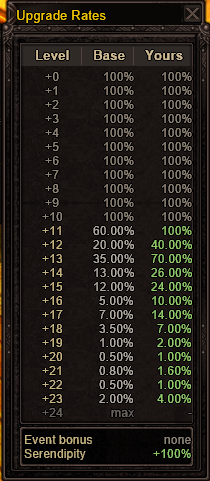
Up to +10 every upgrade succeeds. From +11 the chance drops fast. A Serendipity Potion (100%) doubles your chance.
Current level
Base chance
With Serendipity (100%)
+0 to +10
100%
100%
+11
60%
100%
+12
20%
40%
+13
35%
70%
+14
13%
26%
+15
12%
24%
+16
5%
10%
+17
7%
14%
+18
3.5%
7%
+19
1%
2%
+20
0.5%
1%
+21
0.8%
1.6%
+22
0.5%
1%
+23
2%
4%
+24
max
max
Upgrade Rates · base
Upgrade Rates · with Serendipity (100%)
Upgrade items
Master's FormulaThe formula you upgrade with. Improves an item by up to three levels.
Survival TinctureProtects the item from destruction. Below +11 a failed upgrade changes nothing; from +11 up you can lose up to two levels. The protection is used up on the first failed upgrade.
Serendipity PotionRaises your upgrade chance. The 100% potion doubles it; 150% and 200% versions raise it even more.
Scroll of ReflectionLowers the item's level by 1. Some levels are harder to pass than the one below them (+12 has 20%, +11 has 60%), so you can step back and try to jump past the hard level, since a success gives +1 to +3.
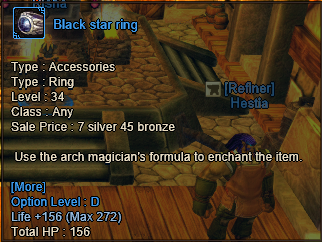
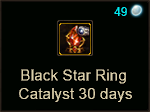
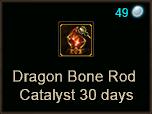
Catalysts let you create an item without buying it from the shop first. They cost 49 Moonstones in the Item Shop and last 30 days.
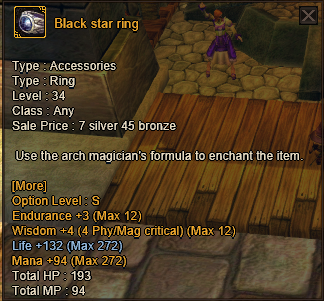
Catalyst + Arch Magician's Formula
Put the catalyst and an Arch Magician's Formula into the Enchant Table.
The item is created as if you had bought it, so its silver price is taken from you.
Bonuses for weapons and armour
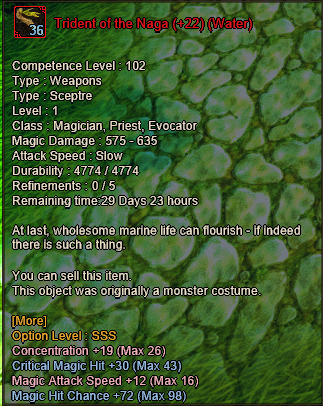
You can add bonuses to weapons and armour the same way as to jewellery, with an Arch Magician's Formula on the weapon, armour or catalyst. It works, but it is not efficient. The better way is runes from Arcane Reagents.
Getting runes
Collect Arcane Reagents.
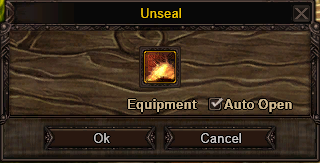
Open them at the Mystic for 5 silver each. Tick Auto Open to open them one after another.
Each one gives a rune with a bonus. Better bonuses are shown in colour.
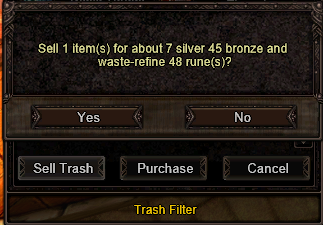
At the NPC, press Sell Trash to turn weak runes into Destroyed Rune of Binding. Trade 5 of them for 1 Arcane Reagent at the NPC in the capital.
Sell Trash converts weak runes
Destroyed Rune of Binding5 → 1 Arcane Reagent
Refining
Runes are put into your gear by the Refiner in Keter / Markut, for a fee.
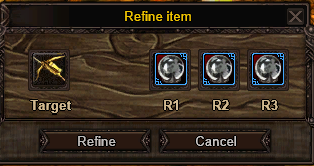
Refine item: target + up to 3 runes
Put your weapon or armour in the Target slot.
Add up to 3 runes with the bonuses you want.
Press Refine.
Result
What happens
Success
The bonuses go onto your item. With 3 runes, anything from 1 to 3 of them can go in
Fail
The runes are lost
◆
Every item can be refined at most 5 times, so at most 15 runes. If you don't get all the bonuses you want, a Formula of Emptiness removes every bonus from the item and resets it to 0/5 refinements.
Refining helpers
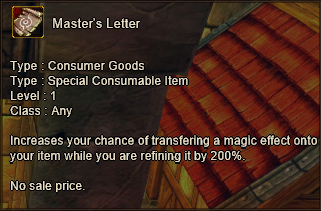
Master's LetterIncreases the chance of transferring a bonus onto your item while refining by 200%. Source: COI Winner chest.
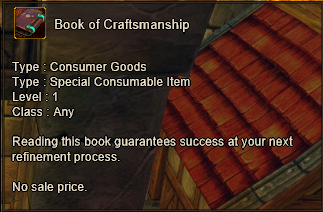
Book of CraftsmanshipGuarantees success on your next refinement. Source: COI Winner chest.
Formula of EmptinessRemoves all bonuses and resets refinements to 0/5.
Master's Letter
Book of Craftsmanship
Alchemist scrolls
The Alchemist crafts the formulas and scrolls you need for jewellery, upgrading and Holy Stones. Sealed items are opened at the Mystic.
Alchemist's FormulaFor yellow jewellery
Flawless Leather
×15
Oil-Soaked Material
×15
Mithril
×15
Sealed Alchemist's FormulaFor yellow jewellery and Holy Stones
Magic Crystal
×8
Magical Herbs
×4
Document of Antiquity
×3
Sealed Scroll of ReflectionFor upgrading and Holy Stones
Magic Crystal
×8
Stone of Wisdom
×4
Almanac of Antiquity
×3
Sealed Cleansing Formula
Magic Crystal
×8
Magical Herbs
×4
Document of Antiquity
×3
Transport Permit
Magic Ink
×27
Water of the Worlds
×24
Magic Crystal and Document of Antiquity: Arahur Spot 2 · Almanac of Antiquity: Narwashi · Magical Herbs and Stone of Wisdom: Second Battle.
A few things that make every farming session pay more.
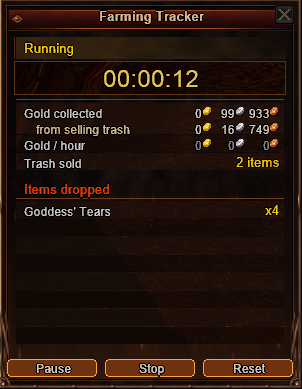
Farming Tracker
The tracker shows how much gold and how many Goddess Tears you earn per hour, and counts every other material that drops.
Farming Tracker
Farm Buff
Farm Buff
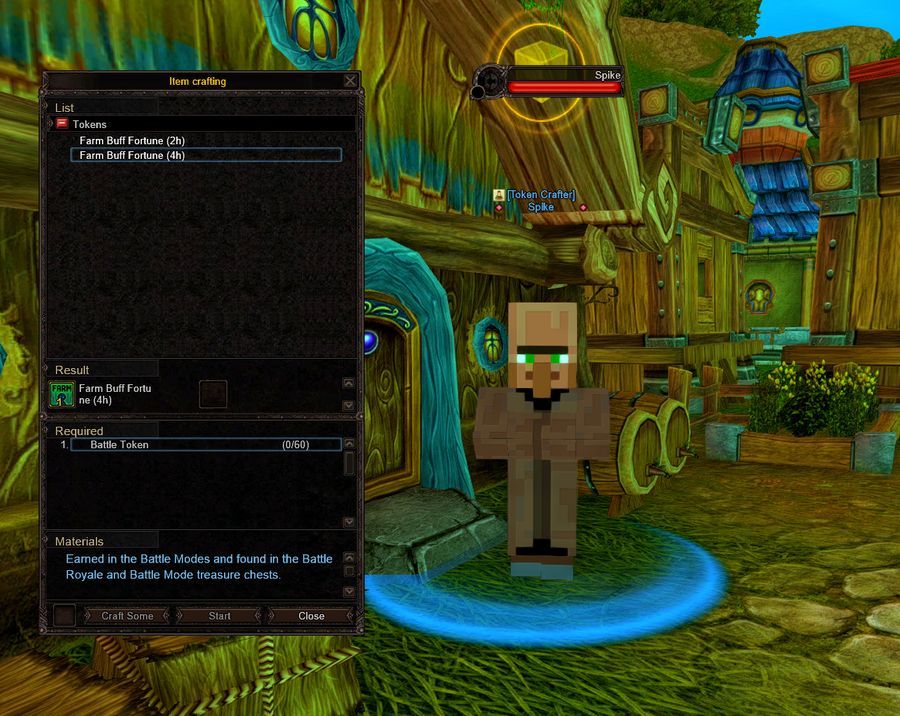
Farm Buff increases your drop rate. Get it from Spike in Lucia (Peace Zone) in exchange for Battle Tokens.
Farm Buff
Cost
2 hours
30 Battle Tokens
4 hours
60 Battle Tokens
Battle Tokens come from playing battle modes: 15 for a loss, 20 for a win.
Tokens expire every day at 00:00 (Central European Time), so spend them on the same day.
Spike in Lucia, Farm Buff in the crafting window
War Farm Buff
There is also a free War Farm Buff: complete your missions in Territory War and Castle War (in Castle War: 10 kills or assists) and your whole account gets +5% drop until the next war.
Item Shop luck boosts
Item
Effect
Duration
Price
Medium Luck
+15% drop
30 min
25 MS
Great Fortune
+20% drop
30 min
29 MS
Both stack with Farm Buff.
Useful helpers
Item
What it does
Collection
Automatically raises your drop from monsters
Fallen Protection
Monster hits no longer knock you off your mount
Travelling Salesman
Sell items anywhere, no trip back to town
◆
Auto-sell and the Trash Filter are on the Settings & QoL page.
Features that save time and make the game more comfortable.
Auto-sell
Automatically sells items with weak options to the NPC, so your bag does not fill up while you farm.
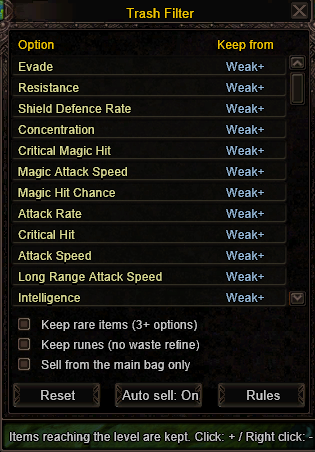
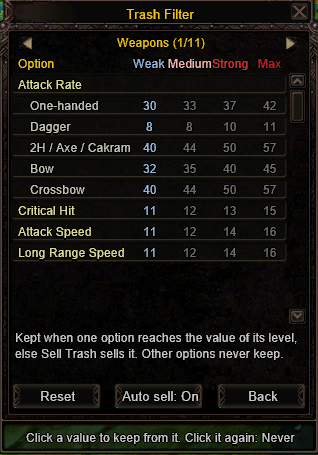
Trash Filter
A custom filter that lets you decide which options count as weak. Set a level for each option, and only items below it get sold. You can change the settings at any time.
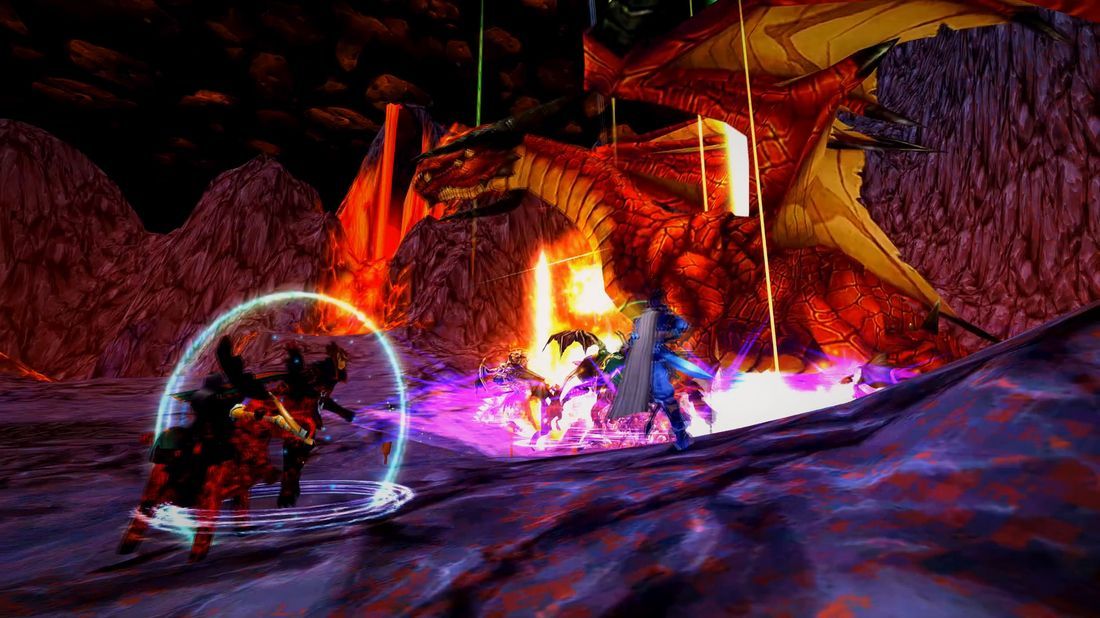
A dungeon with 4 bosses for a party of 2 to 4 players. Every monster you kill earns Goddess Tears, delivered by mail when the dungeon ends. Monsters also drop plenty of items on the way.
Party of 2-4
Goddess Tears✉Delivered by mail◆Item drops from monsters
Joining the dungeon
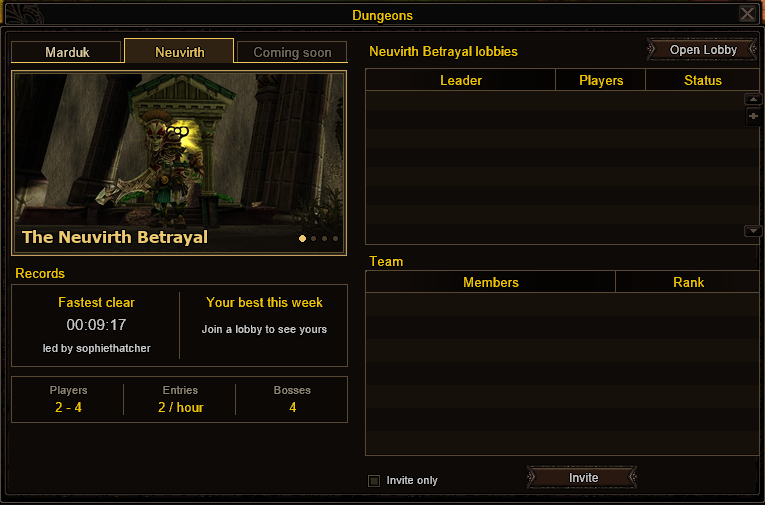
ESC → Dungeons → Neuvirth
◆
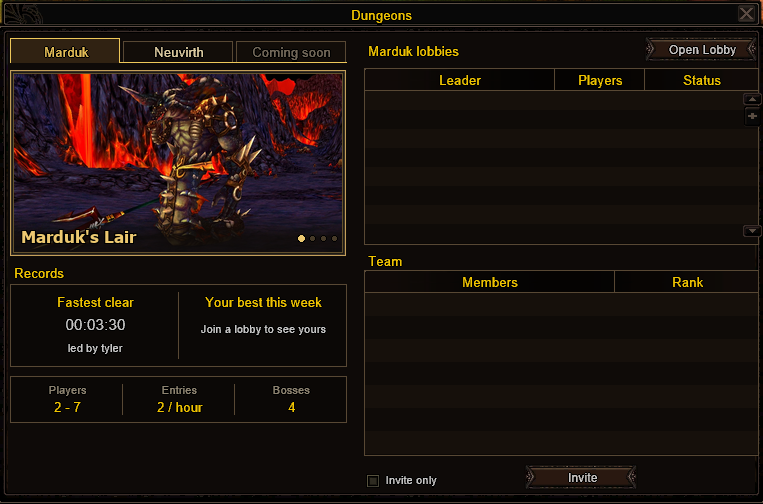
How to join. Open ESC → Dungeons and pick the dungeon. Open your own lobby, or right-click an existing lobby and choose Join. Lobbies are cross-kingdom, so you can team up with players from both kingdoms.
You can enter 2 dungeons per hour in total, of any kind. One Marduk and one Neuvirth Betrayal count as 2.
Every dungeon has a ranking of the fastest clears, plus your own best time this week.
Marduk's Lair works like Neuvirth Betrayal, for a party of 2 to 7 players and 4 bosses. On top of the Goddess Tears, every player receives 10 Marduk Essence for clearing the whole dungeon.
Party of 2-7
Goddess TearsMarduk Essence x10✉Delivered by mail
What can drop from Marduk Essence
Item
Chance
Survival Tincture (x3)
34.85%
Speed Potion (x5)
12.80%
Serendipity Potion (100%) (x8)
12.30%
Invisibility Potion (x3)
12.30%
Master's Formula (x8)
12.30%
Gleaming Green Herbs
5.00%
Gleaming Red Herbs
5.00%
Gleaming Blue Herbs
5.00%
Iron Necklace of Antiquity
0.44%
Fire Dreamowl
0.01%
Joining the dungeon
ESC → Dungeons → Marduk
◆
How to join. Open ESC → Dungeons and pick the dungeon. Open your own lobby, or right-click an existing lobby and choose Join. Lobbies are cross-kingdom, so you can team up with players from both kingdoms.
You can enter 2 dungeons per hour in total, of any kind. One Marduk and one Neuvirth Betrayal count as 2.
Every dungeon has a ranking of the fastest clears, plus your own best time this week.
Osiris Gemstones are rare, so it pays to know every source.
1 · Aaron on Time-Space missions
Aaron can give an Osiris Gemstone on every Time-Space mission: level 19, 29, 39, 49, 59, 69 and 79. The chance is low, so treat it as a bonus while you do your missions.
Time-Space mission, level 69
2 · Ardir boss mission chests
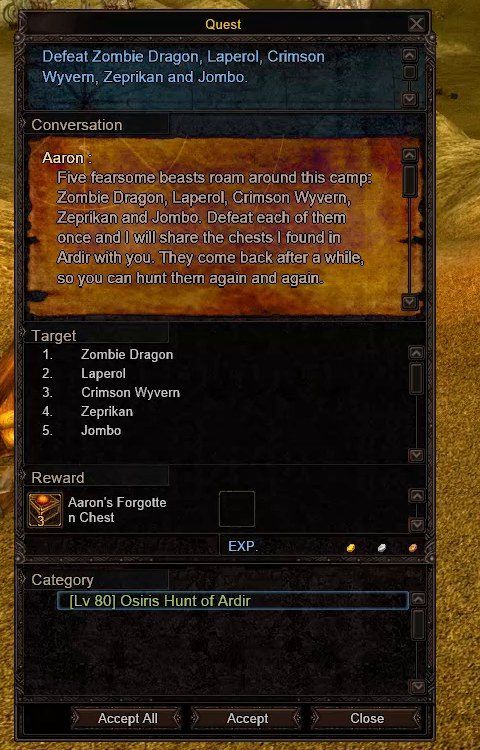
Aaron's mission in Ardir asks you to defeat 5 bosses. The reward is Aaron's Forgotten Chest, which can contain an Osiris Gemstone.
[Lv 80] Osiris Hunt of Ardir
Zombie Dragon
Laperol
Crimson Wyvern
Zeprikan
Jombo
◆
Do it in a party. The bosses die much faster and every player gets their own reward.
Win a match of Champions of Iberia to get the COI Winner chest, which can also contain an Osiris Gemstone.
What can drop from the COI Winner chest
Item
Amount
Chance
Arcane Reagent
1
20.13%
Survival Tincture
1
19.77%
Book of Inspiration
1
15.43%
Book of Craftsmanship
1
13.17%
Master's Letter
1
13.17%
Osiris Gemstone
1
12.46%
Serendipity Potion (150%)
1
5.37%
Glacial Rudolph
1
0.50%
4 · Territory War and Castle War chests
Conqueror's Cache
The chests from Territory War and Castle War can contain an Osiris Gemstone as well. You get a Conqueror's Cache for every Territory War quest, and 15 caches for a won Castle War (12 for a loss). The full drop list is on the Territory & Castle War page.
The World Boss is a mix of PvE and PvP. A strong boss appears on the map, both nations fight it, and you can attack the enemy nation at the same time. At the end you get the World Boss Chest.
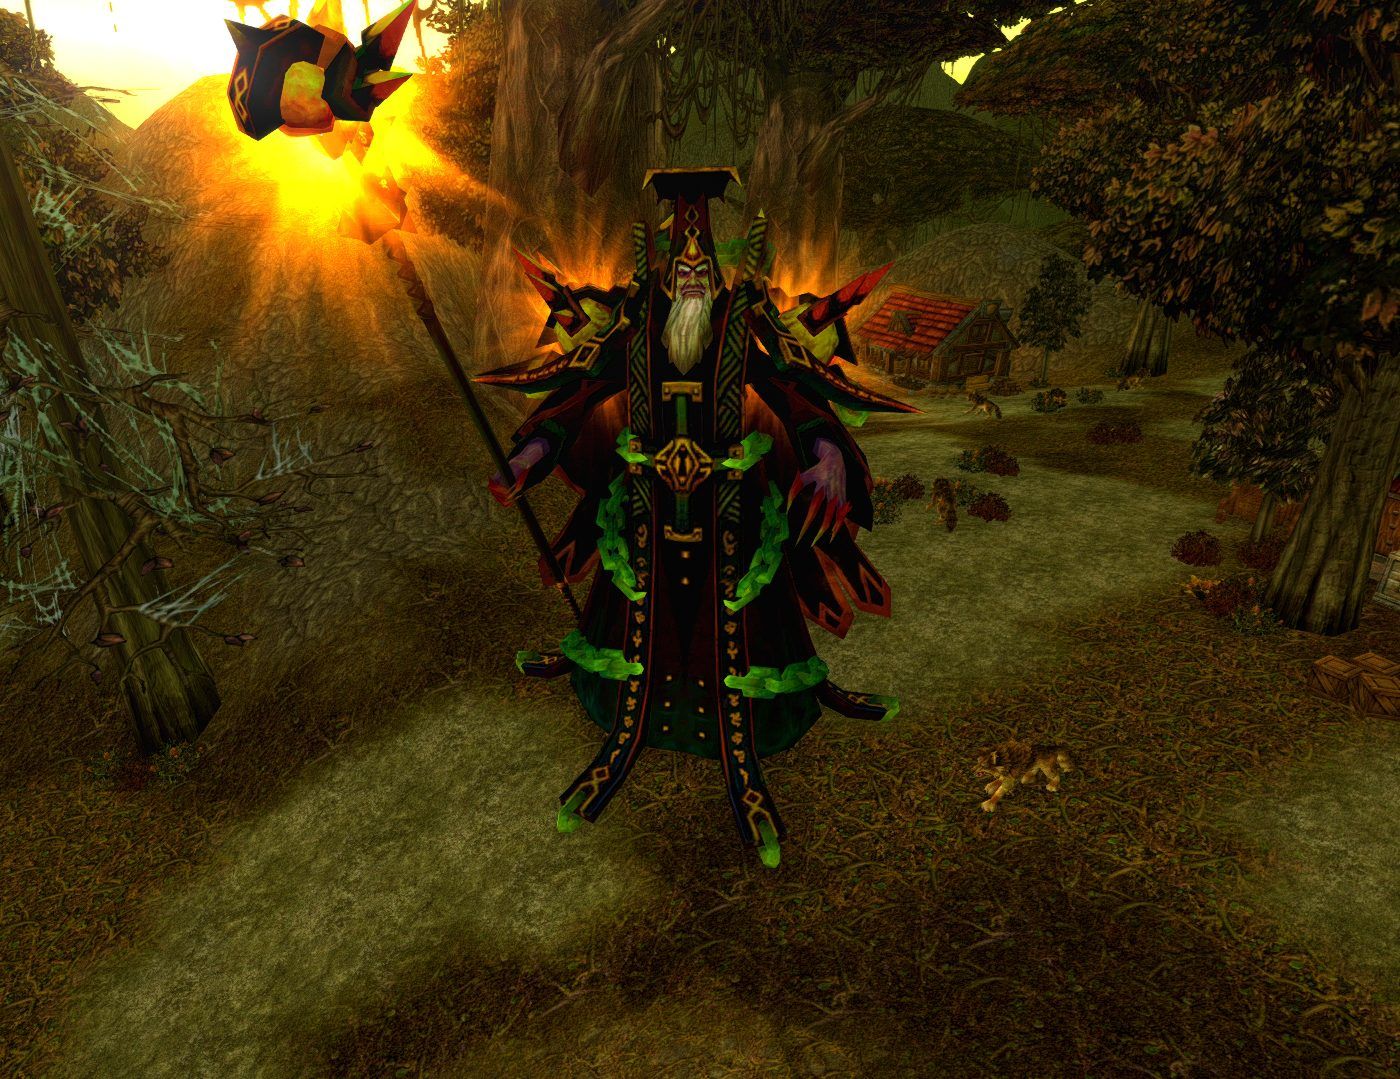
High Priest Kayapa, one of the World Bosses
When does it spawn?
Every day is split into 4 windows (server time). Each window has exactly one World Boss.
Window
Server time
Night
00:00 – 06:00
Morning
06:00 – 12:00
Afternoon
12:00 – 18:00
Evening
18:00 – 24:00
The boss spawns at a random time, at the earliest 10 minutes after the window starts and at the latest 20 minutes before it ends.
Thanks to that, the announcement and the whole fight always fit inside the same window.
A banner on your screen counts down to the spawn, click it to join.
The World Boss banner with the countdown
Which boss?
The World Boss is picked at random, but the same boss never appears twice in a row.
Its HP scales with the time of day, so a boss at peak hours has more HP than one at night.
The fight
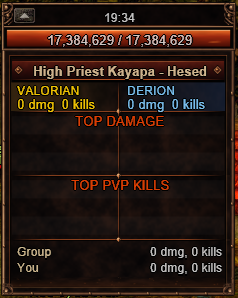
The panel on your screen shows the boss HP, the time left, the damage and PvP kills of each nation, the top damage and top PvP kills lists, and the numbers for your group and for you.
World Boss panel: HP, damage and kills of both nations
Rewards
World Boss Chest
Deal at least 5,000 damage to the boss to be eligible for the reward.
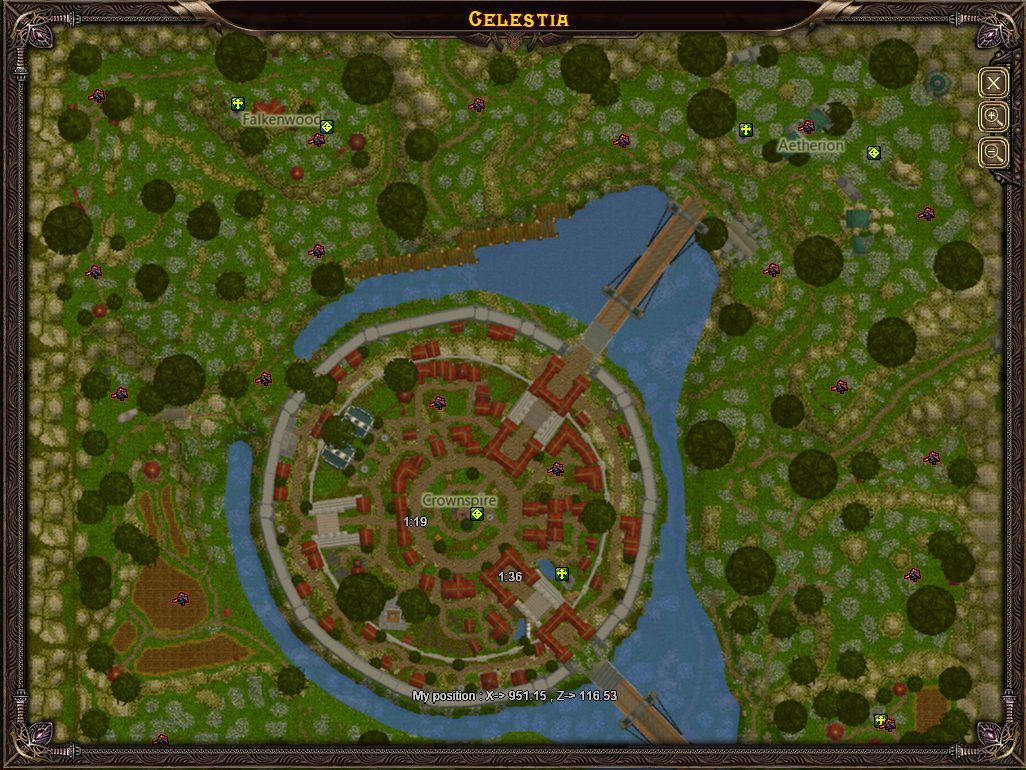
Both nations fight over territories spread across the war maps. Every territory you take can be attacked again after a short peace period, so holding ground needs the whole nation, not just one guild.
Regions
Hesed, Ardir, Gebra and Tyconteroga, each with several territories
Who fights
Everyone can join the fight. Territory bonuses go to the guild that owns the territory
Why it matters
Taking and holding territories earns your guild points for Castle War
Taking a territory
Defeat at least one Gate Guardian. Until then the Patron does not appear.
Destroy the Patron. It does not regenerate HP during the war.
The guild that destroys the Patron takes the territory. Its guards now fight for your nation.
After a capture the territory is safe for a short time, then the enemy can attack it again.
Guilds of the same nation cannot take territories from each other.
The portal inside a territory works only for the nation that owns it.
Quests & rewards
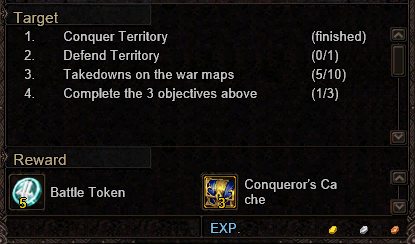
Your Territory War quest starts by itself when you enter a war zone.
Finish all the quests for 12 Conqueror's Caches and 20 Battle Tokens. Every finished objective also gives a War Farm Buff (+5% drop for your whole account until the next war).
Battle TokenConqueror's CacheTW Coin
What can drop from the Conqueror's Cache
What can drop from the Conqueror Chest
Item
Amount
Chance
Serendipity Potion (100%) (x6)
1
19.51%
Survival Tincture (x3)
1
19.51%
Master's Formula (x6)
1
19.51%
Invisibility Potion (x6)
1
18.92%
Osiris Gemstone
1
13.54%
Serendipity Potion (150%)
1
8.81%
Rumapark's Crystal
1
0.10%
Essence of Fear
1
0.10%
TW Coins and Envior
Every Territory War objective you finish gives 1 TW Coin and a War Farm Buff for your whole account: +5% drop until the next war.
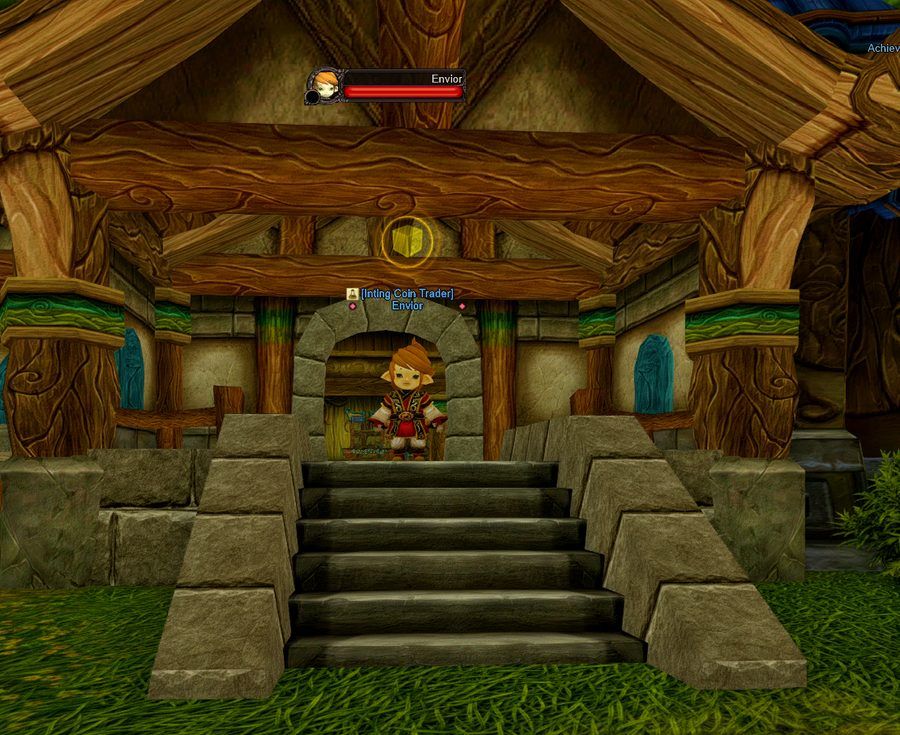
Envior, Inting Coin Trader
Spend TW Coins and Inting Coins at Envior, the Inting Coin Trader. Here is what he crafts:
TW CoinInting Coin
Rumapark's Crystal
TW Coin
×100
Essence of Fear
TW Coin
×100
Black Bear CostumeThe White Festival Dress uses the same recipe
Essence of Metamorphosis
×2
Water of the Worlds
×500
Magic Ink
×100
Survival Tincture
×200
Oil-Soaked Material
×150
Mithril
×150
Flawless Leather
×150
Osiris Gemstone
×15
Crown Jewel
×1
TW Coin
×60
Essence of Metamorphosis
Coincidental Metamorphosis Potion
×1000
Healing Potion
Crown Jewel
×1
◆
Sealed Strong Vitality Potion
×10
Osiris Gemstone
×30
Water of the Worlds
×3000
Inting Coin
×250
Pure Spirit Water
×500
TW Coin
×60
Remote Shop
Water of the Worlds
×20
Magic Ink
×12
Inting Coin
×30
Goddess' Tears
×250
Osiris Gemstone
×2
Costume Effect Change Scroll
Inting Coin
×20
Water of the Worlds
×200
Osiris Gemstone
×7
Mount Effect Change Scroll
Inting Coin
×20
Water of the Worlds
×200
Osiris Gemstone
×7
Corrupted Red
Inting Coin
×10
Water of the Worlds
×100
Osiris Gemstone
×5
Dungeon Weapon Chest
Water of the Worlds
×10
Magic Ink
×10
Castle War
The weekly end-game battle. One guild from each nation fights over a castle. The guilds that earned the most territory points in Territory War qualify.
The Guild Master picks the players for the battle. Mercenaries can join too.
Enter the battlefield through the royal palace in your capital.
The attackers break through the gates while the defenders hold them off.
Holy Items
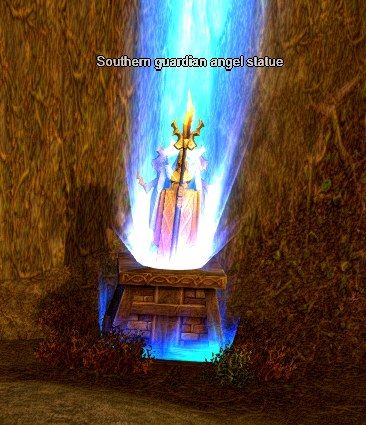
Each nation has Holy Items in its base. Carry them to the Guardian Angel Statues in the castle.
A Holy Item must be delivered within 5 minutes or it returns to its base.
Pick your carriers before the battle so nobody wastes time.
A Guardian Angel Statue in the castle
Winning
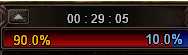
Both sides start at 50%. The more statues your nation controls, the faster your percentage rises. The higher percentage at the end wins. The bar at the top of your screen shows both percentages and the time left.
Time left and the percentage of each side
Rewards
Get at least 1 kill or assist and be on the castle map when the war ends: 20 Battle Tokens and 15 Conqueror's Caches if your side wins, 12 if it loses.
Get 10 kills or assists: the War Farm Buff for your whole account, +5% drop until the next war.


 Mithril ·
 Flawless Leather ·
 Oil-Soaked Material
 Water of the Worlds ·
 Magic Ink ·
 Exclusive Thread
 Osiris Gemstone
 Inting Coin
 Pure Spirit Water ·
 Well Water
 Essence of Fear ·
 Rumapark's Crystal
 Holy Stones
 Quest items












 Farm Buff
 Medium Luck
 Great Fortune


 Goddess Tears


 Farming Arahur · Spot 1

 Gleaming Green Herbs
 Gleaming Blue Herbs
 Gleaming Red Herbs


 Marduk Essence x10




 Mysterious Treasure (Orc Curse)



 Conqueror's Cache

 Spoils of War

 COI Winner chest
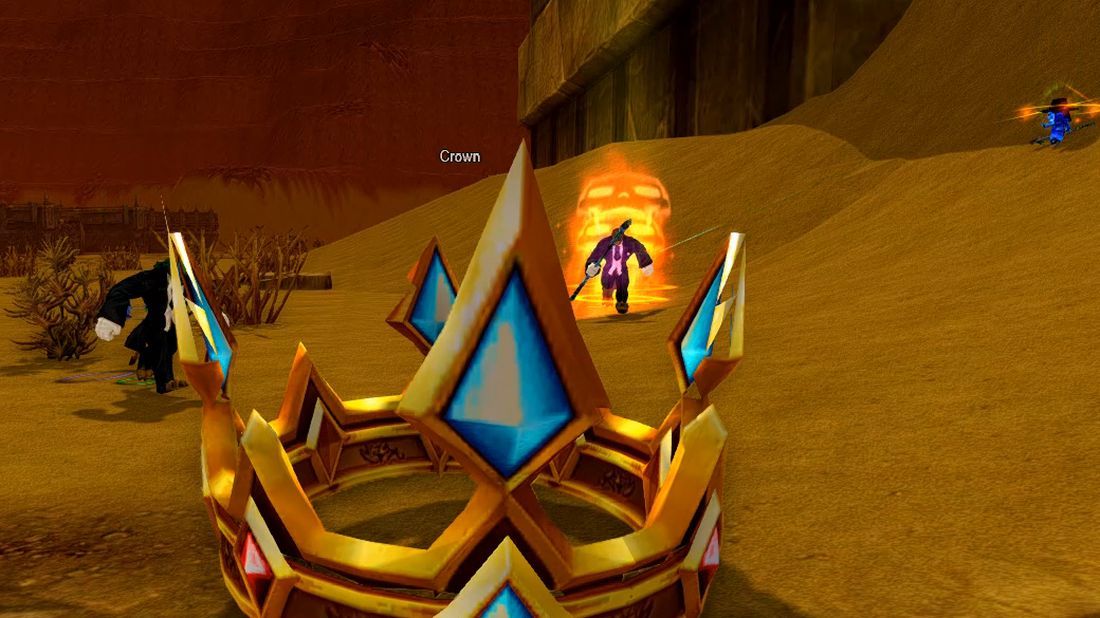

 Hold The Crown chest

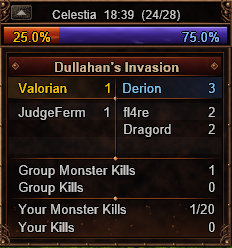
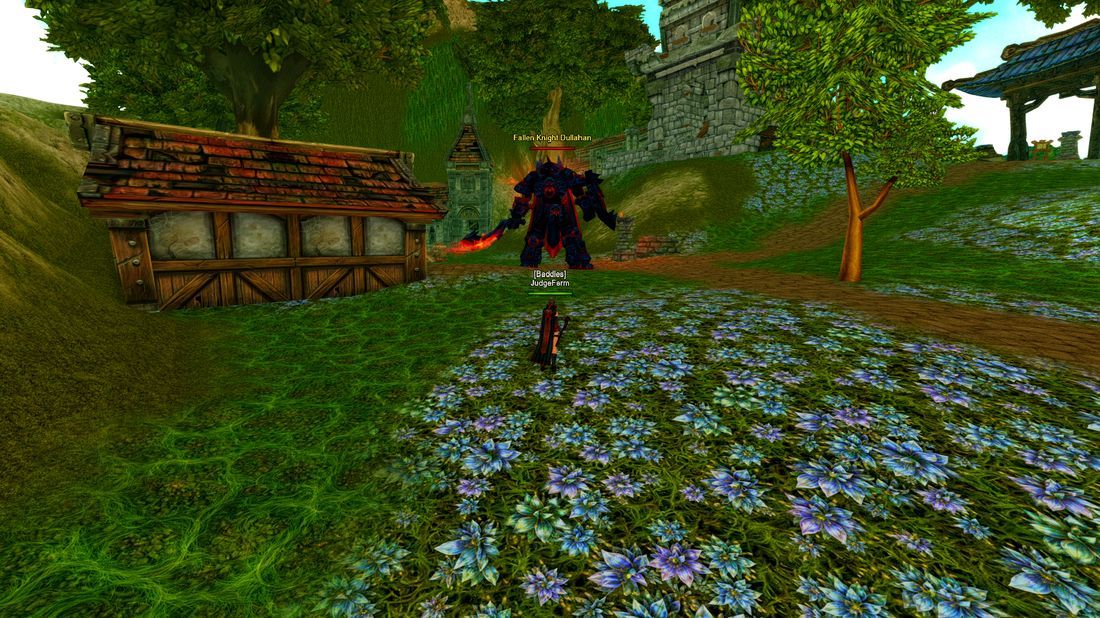
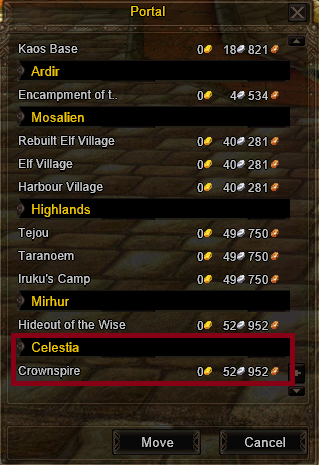
 Dullahan's Chest

 World Boss Chest
 Battle Token
 TW Coin